Streamline Your UI Testing Efforts with Maestro

Introduction
Modern software development needs test automation to handle complex user interfaces (UIs) and fast release cycles. Manual testing can't keep up with the growing complexity of UIs, so automation is essential for reliable and efficient software delivery.
Challenges in Current UI Automation Implementation
The current state of our UI automation implementation presents several challenges that impact its simplicity, effectiveness and maintenance efforts such as:
- Locator Identification:
One of the challenges in current UI automation is identifying reliable locators for UI elements. The process of finding unique and stable locators can be tedious and time-consuming.
Eg: We’ve found cases where the test somehow fails because different versions of Xcode produce different Xpath structure. And this can be highly disruptive as tests running on different slaves will produce different test results.
Xcode 16.0

<XCUIElementTypeOther type="XCUIElementTypeOther" >
            <XCUIElementTypeStaticText name="(PPN + biaya layanan)">           </XCUIElementTypeStaticText>
</XCUIElementTypeOther>
 <XCUIElementTypeOther type="XCUIElementTypeOther" >
            <XCUIElementTypeButton name="$0.99" label="$0.99">                      </XCUIElementTypeButton>
</XCUIElementTypeOther>
Xcode 16.1

<XCUIElementTypeStaticText name="(PPN + biaya layanan)">
</XCUIElementTypeStaticText>
<XCUIElementTypeOther type="XCUIElementTypeOther">
  <XCUIElementTypeButton name="$0.99" label="$0.99">
  </XCUIElementTypeButton>
</XCUIElementTypeOther>- Trial-and-Error Waiting Time:
Another challenge is the reliance on waiting times or sleep statements in automation scripts. This approach involves adding delays in the automation flow, assuming that a particular action or UI element will appear within a specific time frame. However, such trial-and-error waiting times can lead to longer test execution cycles and unnecessary pauses, impacting the overall efficiency of automation.
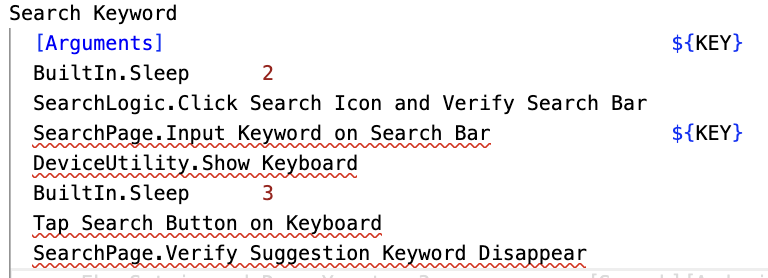
Eg: In Robot Framework, we frequently utilize the "sleep" keyword to mitigate flakiness issues when the desired locator to be tapped has not yet appeared on the screen.
- Flakiness and Maintenance:
Flakiness in current automation refers to the inconsistent and unreliable behavior of automated tests due to various factors such as specific locator not found or changed, asynchronous actions, or slow automation runtime.This creates a lack of confidence in the test results and require additional effort to investigate and debug false failures, leading to increased maintenance overhead.

- Slow Automation Runtime
This refers to the prolonged execution time of our automated test scripts, which can significantly impact our testing efficiency and overall software development lifecycle due to various factors, such as inefficient test scripts, sleep commands, or complex test scenarios.

To address this challenges, We need to understand the root causes and implement strategies to mitigate its impact. This is where Maestro UI automation comes into play.
What is Maestro?
Maestro claims to be the simplest and most effective mobile UI testing framework available today. With the increasing complexity of mobile applications and the need for robust testing solutions, Maestro offers a streamlined approach to mobile UI testing that is both user-friendly and highly efficient.
Maestro UI automation is a versatile framework designed to streamline the testing process by automating the execution of UI tests. It empowers testers to interact with graphical user interfaces (GUIs) in an automated manner, mimicking user actions and validating expected behaviors. By automating repetitive tasks and scenarios, Maestro enables faster feedback cycles, reduces the risk of human errors, and enhances overall test coverage.
Why Maestro?
Our current UI automation relies on the Robot Framework, it is important to consider the advantages and disadvantages of Maestro in comparison to the Robot Framework. By evaluating these factors, we can make an informed decision regarding which framework best suits our testing needs. Here are several considerations for why we interested in trying Maestro:
- Simple setup
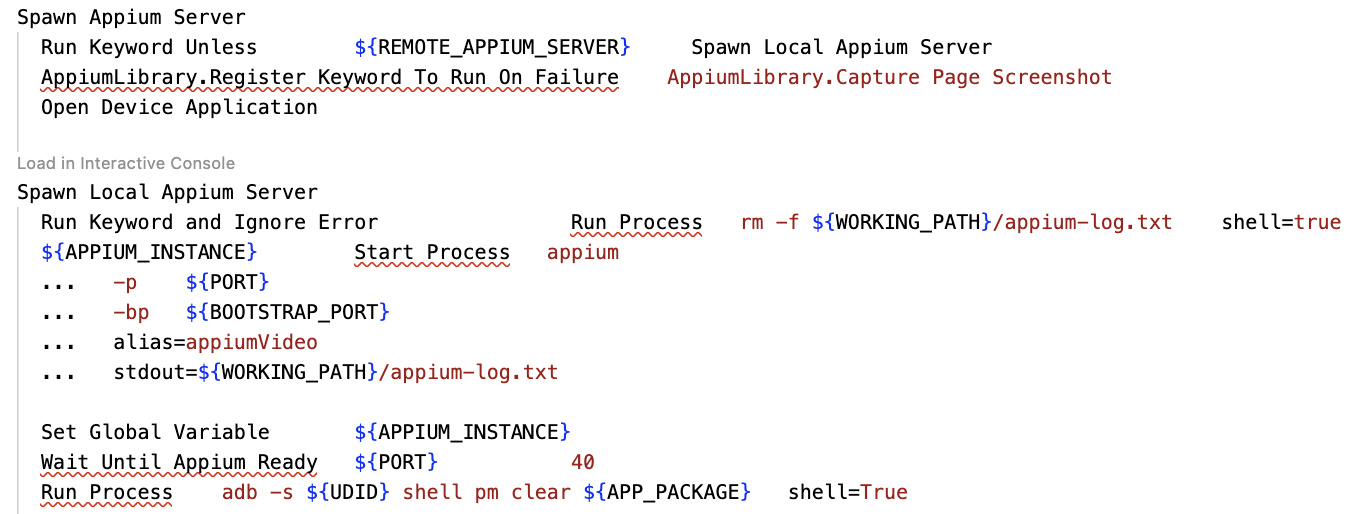
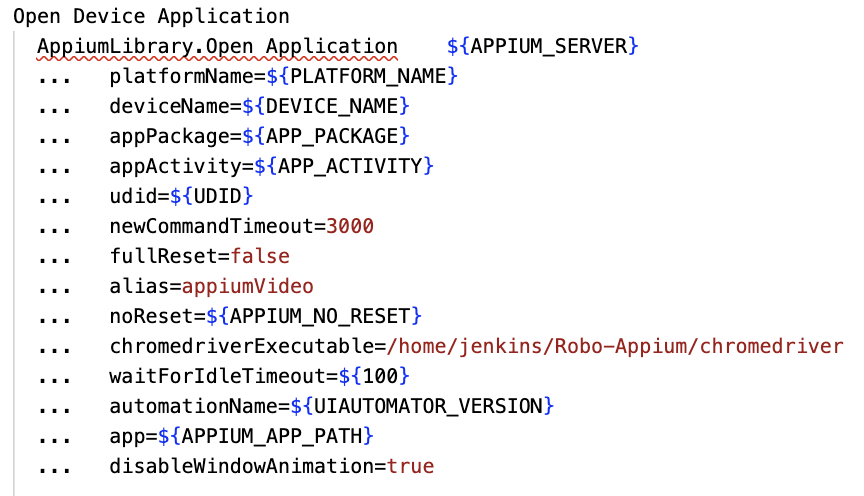
While we have to set up a device to open application and spawn Appium server first to run tests with Robot Framework, even sometimes there are intermittent issues when the Appium server fails to connect. However, with Maestro, we only need to use the "LaunchApp" keyword to launch the app under test. It is as simple as that, and it certainly saves test runtime significantly.
- Tolerance to Locator issues.
For example, suppose there is a button "Masuk" that does not have a specific ID. In this case, we would need to use XPath to verify its locator.

In Robot Framework, we learn the better operator is to use XPath to verify a specific locator, but the step somehow fails because different versions of Xcode produce different XPath structures and this can be a challenge in maintaining the stability of the test. With maestro it will be easier to handle because Maestro can easily perform actions such as verify or click using only text that is displayed on the screen.
- Tolerance to delays.
Maestro knows that it might take time to load the content (i.e. over the network) and automatically waits for it. Maestro tolerates such delays by having a default time to wait until the locator appears on the screen. While in Robot Framework, we often sleep() calls to avoid flakiness when the locator we want to tap has not appeared on the screen yet.
- Feature set (Keyword).
Maestro has a limited feature set. Partly because it’s still new. And partly because it is opinionated on how tests should be written (so not providing various features that go against it). In contrast, the Robot Framework offers a broader and more extensive set of features, providing testers with a wider range of options and flexibility in test design and implementation.
Comparing Maestro vs Robot Framework
By considering these factors, we believe that mastering Maestro is the key to achieving seamless end-to-end testing, reducing manual efforts, and enhancing overall software quality.
One of the standout features of Maestro is its ability to handle complex UI scenarios effortlessly. Whether it involves dynamic elements, asynchronous actions, or complex data-driven tests, Maestro provides the necessary flexibility and adaptability to effectively address these challenges.
Therefore, we have decided to explore Maestro as a potential replacement for Robot Framework in our daily testing activities. We aim to evaluate whether Maestro surpasses Robot Framework in terms of usability, efficiency, and effectiveness. Through this comparison, we seek to identify the tool that best fits our testing needs and can contribute to improved productivity and test quality in our daily operations.
- Flakiness.
Tests using Maestro are significantly less flaky. Although Maestro doesn't directly solve flakiness issues, its robust scripting capabilities and streamlined execution can contribute to more stable and reliable test results, reducing the need for excessive maintenance.

- Test Execution Speed.
While the specific test execution speed may depend on various factors such as test complexity and network conditions, Maestro is designed to optimize test execution speed, minimizing unnecessary delays and improving overall efficiency. Robot Framework may have slower execution times, especially when dealing with complex UI scenarios. For comparison, we have tried running our gold tag automation using both Maestro and Robot Framework.

- Learning curve.
Maestro ▲, offers a user-friendly interface and intuitive design, which can help reduce the learning curve for users who are new to UI automation testing. making it easier for testers to create and maintain UI automation tests.
Robot Framework ▼, on the other hand, may have a steeper learning curve and require more configuration. typically considered to be beginner-friendly as it provides clear and concise test case organization and supports a wide range of test libraries.
- API Response.
Robot Framework ▲, provides built-in libraries and keywords for performing API testing. It allows testers to send HTTP requests, verify responses, and perform assertions on the data. making it easy to define test scenarios and assertions for API responses.
Maestro ▼, is focused on mobile UI automation testing. While it supports web testing as well, its capabilities for API response testing is more limited.
- Test Reporting.
When it comes to test reporting, Maestro and Robot Framework have different approaches and formats for presenting test results. While Maestro's default XML format may not be as human-readable as Robot Framework's HTML reports, it still provides valuable structured data that can be processed and analyzed programmatically.

Indeed, Maestro offers a more comprehensive test report that includes valuable features such as screenshots, screen recordings, and app logs captured during test execution.
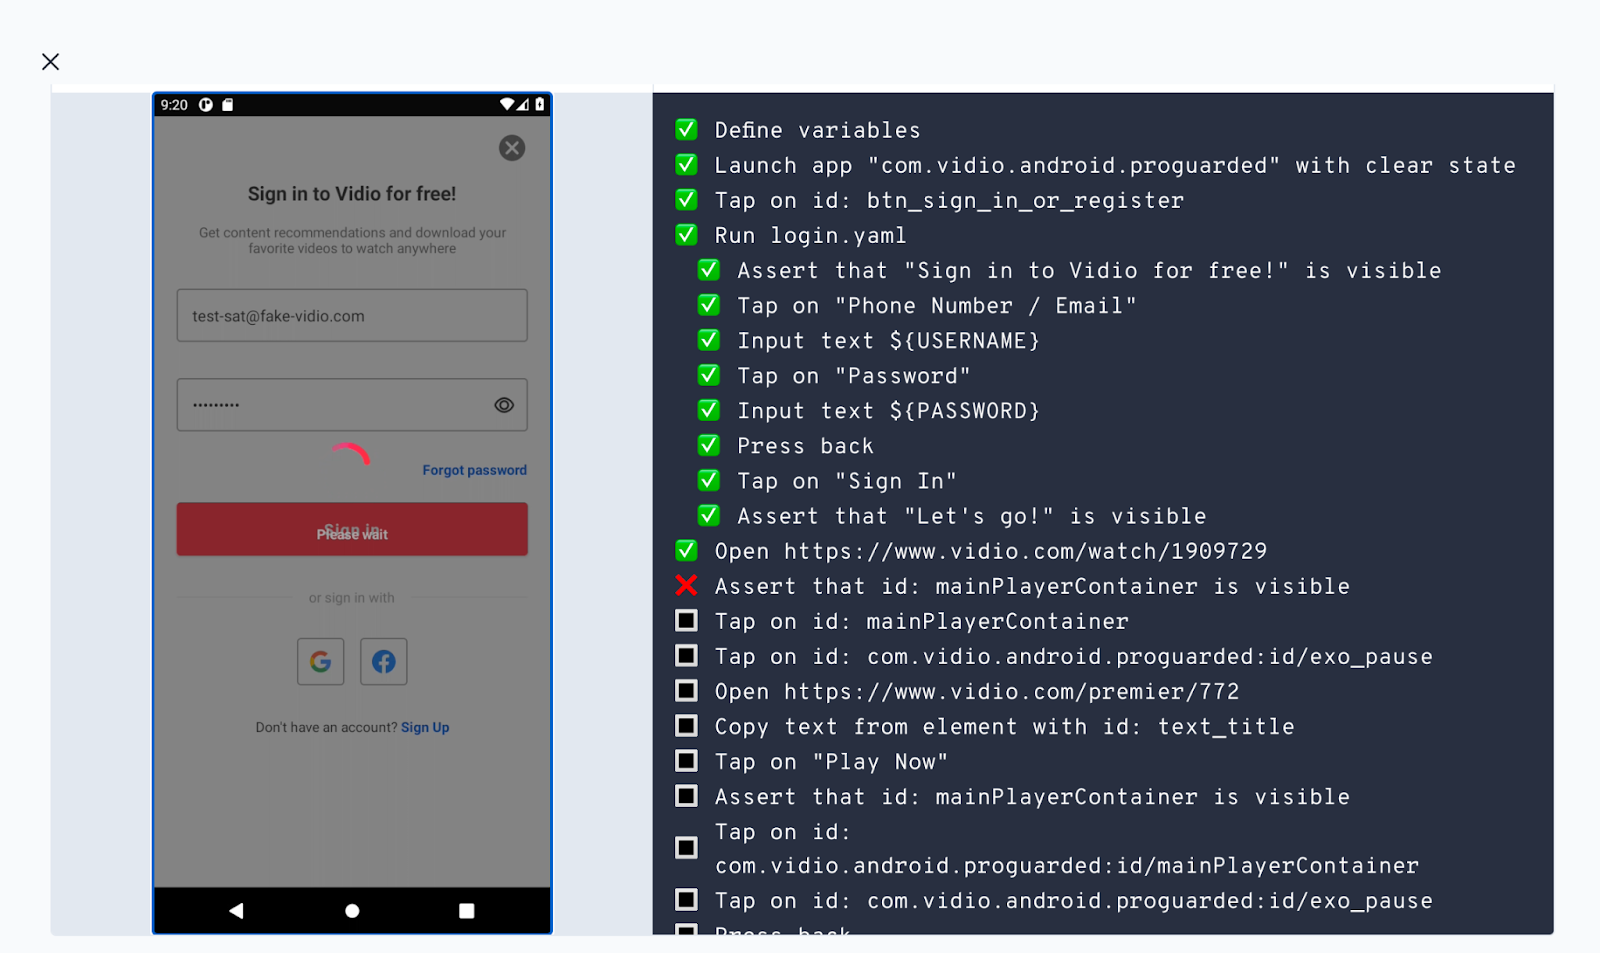
However, this feature are available exclusively in Maestro Cloud and may come with additional costs. We also feel that, at the moment, we don't have a strong need for it, Therefore, we have developed our own solution to record videos for observing failing tests.
And afterward, we add the following logic to retrieve the screen recording file only for failed flows.
Afterward, we add the following Groovy script to archive files in the .mp4 format as well.
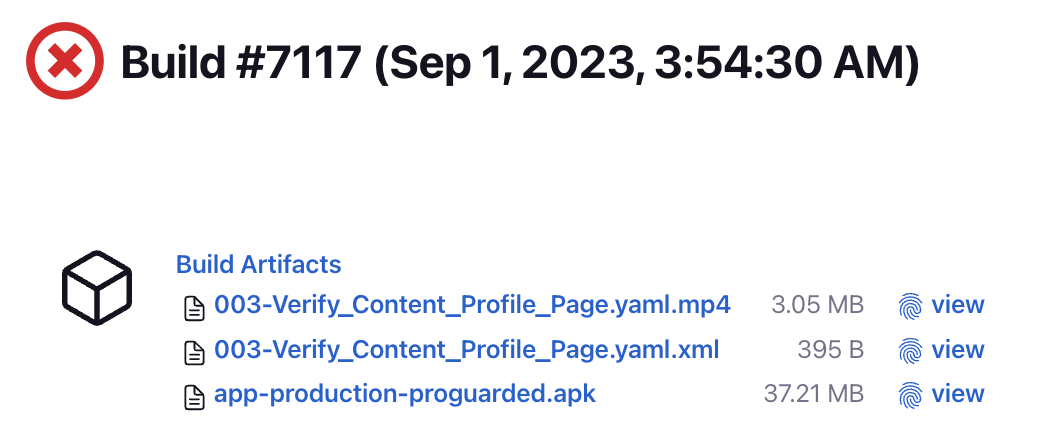
As a result, for each failed flow, the workflows that have been screen-recorded will be shown in our CI job, enabling us to directly examine the failed workflows by reviewing the screen recordings. This provides us with a similar feature set to what Maestro Cloud offers without the need for additional costs.
Continues Development.
Robot Framework ▲, has a well-established and active community that contributes to its continuous development, ensuring a robust and evolving framework.
Maestro ▼, being a newer framework, may have a smaller community at present, but its growth and development potential should not be underestimated.
Conclusion
While both Maestro and Robot Framework are valuable tools for automation testing, they cater to different needs. Maestro shines in mobile UI testing due to its user-friendly approach, built-in mobile features, and powerful scripting. Robot Framework, on the other hand, provides flexibility, extensibility, and a strong community for broader automation tasks.
Maestro: Mobile Testing Made Easy
In essence, Maestro simplifies mobile UI testing. It offers advantages like efficient test creation and execution, robust scripting capabilities, and smooth integration with popular frameworks like Selenium and Appium. This empowers testers to deliver high-quality mobile applications with confidence and efficiency.